Carolina LabSheets™
Overview
The story of how a seed becomes a plant is fascinating to young students. These activities will help them explore the process of germination. Students will observe the internal structure of a seed, seed germination, and early seedling growth. The activities are recommended for grades K–4 and can be done as part of a life cycle unit of study. For kindergarten and first grade, you might consider doing the Seed Germination activity only, leaving the Seed Structure activity for a later grade.
Needed Materials*
- lima bean seeds (158335)
- hand lenses (602276 or similar)
- clear plastic cups (4 to 8 oz)
- potting soil (159705 or similar)
- plastic spoons
- permanent markers
- paper towels
- plastic buckets or other containers for moistening the potting soil
Optional Materials
Water Conditioner (671944) to treat tap water.
Safety
Ensure that students understand and adhere to safe laboratory practices when performing any activity in the classroom or lab. Students should not put their fingers into their mouths during these activities. They should wash and dry their hands after each activity. Demonstrate the protocol for correctly using the instruments and materials necessary to complete the activities, and emphasize the importance of proper usage. Use personal protective equipment such as safety glasses or goggles, gloves, and aprons when appropriate. Model proper laboratory safety practices for your students and require them to adhere to all laboratory safety rules.
Procedures
Students can work individually or in pairs. If students have not used hand lenses before, have them view some common objects with a hand lens before beginning this activity.
Seed Structure
On the day before the activity, place lima beans in a cup and cover them with springwater or tap water that you have treated to remove chlorine and chloramines. Drinking water drawn from surface reservoirs in the U.S. is now typically treated with chloramines to meet new standards for drinking water quality. Unlike chlorine, chloramines cannot be removed by leaving the water in an open container for 24 to 48 hours. Chloramine can be removed only by use of a dechlorinator such as Water Conditioner (671944). Failure to remove chloramine from the water may result in delayed germination or failure to germinate. Water from wells does not contain chloramine. Cover the seeds with water to a depth triple their diameter to allow for absorption of the water and expansion of the seeds. The absorption of water initiates germination. Do not leave seeds covered by water for more than 24 hours because they may begin to rot. If you have to delay the activity, pour off the water and place the soaked seeds in a plastic bag. They can be held for at least an additional day in this manner. After 2 days in a plastic bag, the seeds may begin to germinate or they may develop mold.
Make a drawing of the inside of a bean seed on the board or on chart paper. Base your drawing on the illustration of the bean seed on the Seed and Seedling sheet. Since some of the terms used on the sheet may be unfamiliar, use the following as a guide:

Students will need presoaked lima bean seeds and hand lenses for this activity.
Seed Germination
Either soak more bean seeds for this activity or use intact been seeds from the preceding activity. Students should understand that they are not to take these seeds apart. If you think they will do so anyway, use dry seeds. It will take longer for them to absorb water and germinate, but they will work.
Use springwater or dechlorinated tap water to moisten enough potting soil to fill the cups. Proper moisture content can be judged by a pinch test. Pinch a bit of the moistened potting soil between thumb and index finger. The soil should not drip water but when you release pressure, the soil should form a cohesive layer on your thumb. If the soil is powdery, it is too dry. If it drips water, it is too wet and you should mix in some dry potting soil.
Read through the student procedure on the Student LabSheet to decide how much help your students will need to complete the setup.
Students need the following materials:
- presoaked lima bean seed
- clear plastic cups
- premoistened potting soil
- plastic spoons
- permanent markers
- paper towels
Have students write their names on the outsides of the cups with the permanent markers. Demonstrate the planting procedure to the students. Fill a cup with moist potting soil. Use a pencil to make a planting hole in the potting soil on each side of the cup. Make the hole so that the bean seed will be pressed against the side of the cup. In this way your students will be able to see the seed germinate and grow.
Either place the planted cups in a window or under fluorescent lights. Bean seeds have large cotyledons with a lot of stored food, so they do not need intense light to germinate and grow seedlings. Watch the potting soil to be certain it does not dry out. Remember that the cups do not have drainage holes, and do not saturate the potting soil with water.
Let the students observe the cups each day for changes to the seeds. Ask questions to help students think about their observations:
What is the first part of the seedling that grows out of the seed? The root
What happened to the seed coat? It stays behind in the soil or is dropped onto the surface of the potting soil.
What happens to the seed leaves? They remain attached to the stem and are pulled above the potting soil as the stem grows. As the seedling grows, they shrivel.
What happens to the leaves? They unfold and grow larger.
Have students make drawings that show the major stages of germination, including the emergence of the root, which is the first indication of germination, the emergence of the stem as a curved structure, the growth of secondary roots from the primary root, the emergence of the seedling above the soil surface, and the unfolding of the first leaves. Have them label the major structures shown and date the drawings. Students can also number each drawing to show the days after planting. By the end of the activities, they should have a good knowledge of the changes that occur from seed to seedling.
Have students write about their seed and what happens to it.
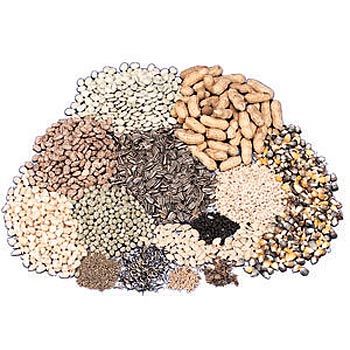
Optional: Seeds of other plants can be germinated for comparison to the beans. Corn (159243) is a monocot and makes a good contrast to the lima bean, which is a dicot. Corn seed is much harder than the lima bean and cannot be dissected without use of a sharp blade, so you may not want to use it for seed structure; however, corn germinates readily. Sunflower seed (159063) and garden pea (158883), which are both dicots, and rye grass, which is a monocot, may also be used to study germination. Students may also dissect unshelled peanuts. The peanut shell is the pod. The papery red covering of each peanut is the seed coat. Peanuts are dicots and consist of two halves, which are cotyledons. These are easily separated. With a hand lens, students can see the plant embryo, with the plumule, hypocotyl, and radicle. Students may enjoy germinating raw peanuts.

RELATED PRODUCTS
plant Resources

A Classroom Model for Teaching Natural and Artificial Selection on Your Schedule

Wisconsin Fast Plants® and Product Testing

Teachers’ Guide to Classroom Grow Lights for Healthy Fast Plants

Hydroponic Nutrient Solution

How to Teach the Crosscutting Concepts with Wisconsin Fast Plants

Materials Plants Need to Grow

What Do Plants Need to Grow?

Teaching Variation and Selection in the Context of Plant Breeding with Wisconsin Fast Plants


