By using models, diagrams, group discussions, peer review, labeling exercises, etc., we can create student portfolios that detail the growth of each student throughout a unit of instruction.
Artifact is an exciting and a thought-provoking word. It brings to mind the idea of archaeologists on digs in far-off lands–scientists discovering exotic and rare finds that give us clues to the past. The use of artifacts in the classroom can provide similar insight into our students’ thinking.
“The National Research Council’s (NRC) Framework describes a vision of what it means to be proficient in science; it rests on a view of science as both a body of knowledge and an evidence-based, model and theory building enterprise that continually extends, refines, and revises knowledge.”*
By using models, diagrams, group discussions, peer review, labeling exercises, etc., we can create student portfolios that detail the growth of each student throughout a unit of instruction.
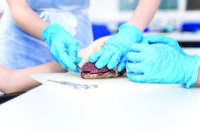
Dissection is a powerful tool for student engagement and interest. The concepts taught through this type of hands-on experience are important to many disciplines and help us investigate the crosscutting concepts of cause and effect, structure and function, and systems and system models. The term model is often used when discussing three-dimensional instruction and not only refers to physical replicas but also diagrams, analogies, computer simulations, etc. This article considers ideas for implementing ways students can display, think about, discuss, and revise their learning with a focus on modeling and labeling exercises. It refers to examples of student learning as artifacts: student-specific products that demonstrate a progression of learning.
The First-Look Model
Begin the modeling exercise by having students draw on their prior knowledge to create a 3-D model of the organ or system being studied. This article uses the digestive system of a frog to illustrate the progression of the modeling procedure. A great hook to engage students prior to the building of this model is a slow-motion video of a frog capturing prey, such as a cricket or a fly.
Divide the class into small groups, and explain that you would like students to use materials that you will provide to construct a model that shows the path of a food item as it travels through the frog’s digestive system, from the capture of the prey to its expulsion as waste. Provide them with a variety of materials that have varying qualities. These could include paper towels, pipe cleaners, cups, string, construction paper, etc. Clarify with students (depending on grade level, prior knowledge, and your comfort level with guidance) whether you will be looking only for organs in the direct path of food or whether you expect them to include accessory organs that aid in digestion.
When selecting materials for your supply table, keep in mind the crosscutting concept of structure and function. Tubing that varies in width, length, and flexibility can represent a variety of structures in the body. Students may look for balloons as models for stomach and gallbladder structures. Circulate among students during this process, assisting as they gather materials and listening to students’ thoughts about their selections and model assembly. This, along with the next step, provides excellent insight into students’ prior knowledge.
The Group Go-Around
This is my favorite way to collect data about the first-look artifacts as students discuss their ideas and reasoning behind their models. Place the class in a circle, grouping students with their models. Create a data response sheet for students to fill out while, or after, their classmates present. Allow each group of students to present their model and explain the pathway of food, the reasoning behind their choice of material, and their current understanding of how structure and function correlate to the digestive system model.
Ask student observers to make notes about which parts of the presenters’ model they agree with and which parts they have questions about. Ask your own questions regarding the thought process or reasoning behind the placement of an organ or the choice of a material. Invite student observers to respectfully comment and ask questions as well.
Making a Class Model
After all participants have presented their models, create a class model that represents the ideas, thoughts, and final consensus of the entire group. As a teacher, it is tough to include student ideas that may be incorrect or leave out concepts that students miss, but at this time, it is important to represent the artifact from the students’ perspective. Photograph the class model, and print the image out for student portfolios.
What Makes a Good Scientific Model? A good model is: based on reliable observations. able to explain the characteristics of the observations used to formulate it. predictive. able to explain phenomena that were not used to develop the model. able to be refined when new, credible, conflicting observations arise. limited and simplifies a concept, theory, or object. physical (2-dimensional or 3-dimensional) or mathematical (includes a single formula or many formulae) or conceptual (digital or print). a computer or physical simulation of a natural phenomenon.
Getting Ready to Dissect
An effective way for students to further build on prior knowledge and prepare for dissection is through preassessment. Many of Carolina’s dissection kits offer digital assessments through Carolina Science Online®. Create an account, assign the assessments to your students, and have them perform labeling exercises prior to the dissection. This will give them a heads-up approach to the structures they will be encountering. If you have a flipped classroom, assign the assessment for the evening before the dissection day.
If you are unable to use digital assets, print out a diagram and have students practice labeling the structures that they will be investigating.
Proceed with the dissection, having students explore both the internal and external anatomy of the frog. Set aside ample time for the examination of the digestive system, emphasizing the pathway of food movement from capture to expulsion as waste. Ask students to really study the system with the idea of structure and function in mind. Prepare a data table for students to record the food’s journey through the digestive system along with notes about structure (color, size, texture) and possible function. Remind them that they will be revisiting (and revising) the class model.
Returning to the Artifacts
After the dissection, it is always exciting to revisit previous artifacts (initial model, class model, and labeling exercises) to see the growth that students have made as learners. Allow students to guide the roundtable discussion about the class model and what they learned from the dissection. Have them create a T-chart about parts of the class model that are correct and parts that need revisions. Also, reassign the digital labeling exercises to further assess student learning.
The progression of student learning through creating artifacts, such as modeling and labeling exercises, is key in the hands-on experience of dissection. The creation of the artifacts can be just as thought provoking and enjoyable as the dissection itself!
Written by:
Patricia Kopkau
High School Teacher
Whittemore-Prescott High School
Whittemore, Michigan
*NGSS Lead States. Next Generation Science Standards: For States, By States. “Three Dimensional Learning.” Accessed January 11, 2019. http://www.nextgenscience.org/three-dimensions.


