Physics and biology may not seem related, but when understanding and explaining vision, it’s useful to draw on concepts from both disciplines. You can combine biology and physics with a touch of art into one lesson that focuses on the art and engineering of creating two-dimensional images with the illusion of depth.
The concepts of structure and function of the eye, perception, and optics and color blend in this simple activity that amazes students and gives them insight into the 3-D technology that they enjoy in movies, video games, and graphics.
Activity Objective
Create and explain 3-D images and visually perceive how human eyes work together to generate an image that appears to bounce off the page.
NGSS Standards
Science and Engineering Practice: Constructing Explanations and Designing Solutions
Disciplinary Core Ideas:
A: Structure and Function
D: Information Processing
A: Wave Properties
B: Electromagnetic Radiation
PD4.C: Information Technologies and Instrumentation
Select a line drawing and cut out the four component images of that line drawing.
Obtain 4 acetate sheets. Label the acetate sheets 1–4 in the upper right corner.
Place the acetate sheet labeled “1” on top of the partial line drawing labeled “1.” Using black ink, trace the black lines on this acetate sheet. Allow time for the ink to dry.
Using red ink, trace the red lines on acetate sheet 1.
Place the acetate sheet labeled “2” on top of the partial line drawing labeled “2.”
Using cyan ink, trace cyan lines onto acetate sheet 2.
When all lines have been traced and the ink is dry, assemble the front layer of the anaglyph by placing acetate sheet 1 on top of acetate sheet 2.
Shift acetate sheet 1 slightly to the left so that the red lines are to the left of the cyan lines.
Place the acetate sheet labeled “3” on top of the partial line drawing labeled “3.”
Using red ink, trace the red lines on acetate sheet 3.
Place the acetate sheet labeled “4” on top of the partial line drawing labeled “4.”
Use the cyan ink to trace the cyan line on acetate sheet 4.
When all lines have been traced and the ink is dry, assemble the back layer of the anaglyph by placing acetate sheet 3 on top of acetate sheet 4.
Shift acetate sheet 3 slightly to the right so that the red lines are to the right of the cyan lines.
Assemble the anaglyph by placing the front layer (sheets 1 and 2) on top of the back layer (sheets 3 and 4). Place the stacked sheets on a piece of white paper.
View the completed image through the red/cyan 3-D glasses to observe the three-dimensional illusion.
Use your knowledge of vision, light, and color to explain the 3-D effect.
Explanation
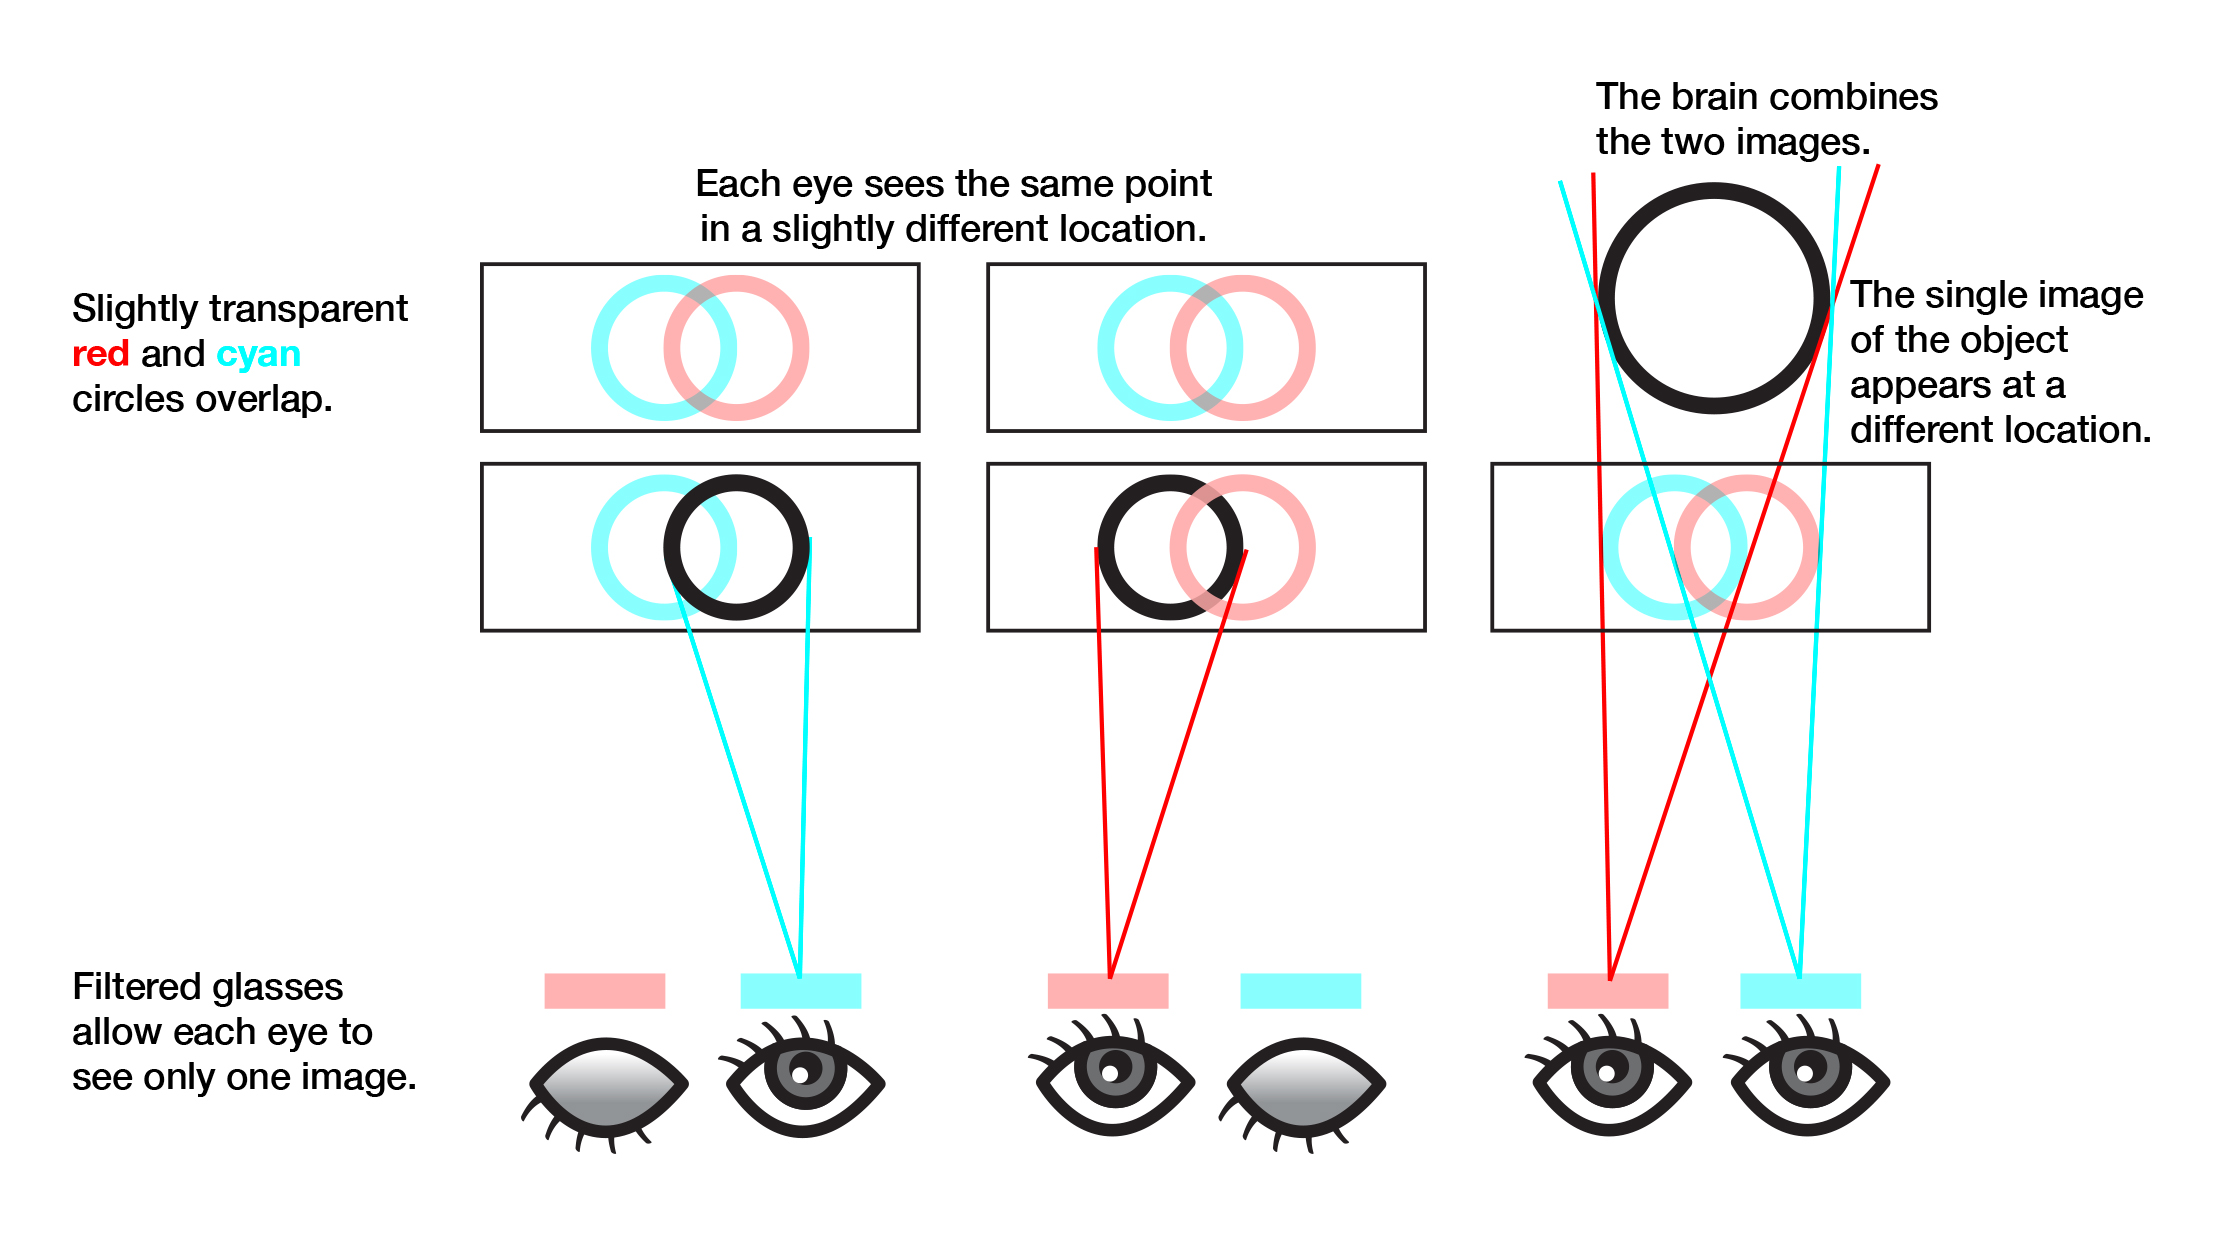
The science behind human eyesight relies heavily on the communication between the eyes and the visual cortex, which is in the posterior portion of the brain. Humans rely on binocular stereoscopic vision, which involves two eyes seeing slightly different images due to observations being made from two slightly different points. The brain converts the two slightly different images into a single image that denotes depth. When looking through the colored filters in 3-D glasses, both eyes are open but only one of the two overlapping images is transmitted to each eye. This feature allows us to perceive depth within a two-dimensional image.
Carolina is teamed with teachers and continually provides valuable resources–articles, activities, and how-to videos–to help teachers in their classroom.