The Rock Cycle and Earth Processes
How are rocks formed and altered through
the cycling of earth’s materials?
Prep: 30 mins | Activity: 30-45 mins
6-8 Middle School
Introduction
This is an introductory activity that relates earth processes to the rock cycle. Students construct a rock cycle model based on rolls of a geological process cube. The rock cycles generated using the cube should be unique to each group or student, just like rocks in different places go through different processes depending on local weather, climate patterns, and plate movements. A rock cycle is rarely as simple as textbook diagrams portray. Weathering and deposition, temperature, and pressure interact to modify rocks over time.
Phenomenon
As a demonstration, set up identical lengths of three types of pipes: copper, aluminum foil tube, and PVC, and simultaneously drop a metal nut from the top of each pipe. All three nuts should fall at the same velocity and hit the bottom at the same time. This demonstration helps students focus on the relationship between the magnetic field and the material from which the pipe is made.
Essential Question
How are rocks formed and altered through
the cycling of earth’s materials?
Activity Objectives:
- Create a model to describe how the cycling of earth’s materials forms and alters rocks.
- Determine and explain the energy source for each cycle process.
Next Generation Science Standards* (NGSS)
PE MS-ESS2-1. Develop a model to describe the cycling of earth’s materials and the flow of energy that drives this process.
SCIENCE & ENGINEERING PRACTICES
Developing and Using Models
- Develop and use a model to describe phenomena.
DISCIPLINARY CORE IDEA
ESS2.A: Earth’s Materials and Systems
- All earth’s processes are the result of energy flowing and matter cycling within and among the planet’s systems. The energy is derived from the sun and earth’s hot interior. The energy that flows and matter that cycles produce chemical and physical changes in earth’s materials and living organisms.
CROSSCUTTING CONCEPTS
Stability and Change
- Explanations of stability and change in natural or designed systems can be constructed by examining the changes over time and processes at different scales, including the atomic scale.
Materials Needed
- Rock samples for phenomenon
- Rock photographs
- 4” × 4” box for constructing the geology processes cube
- Weigh boat
- Craft stick
- Soft fruit chew candies, 5–8
- Dark colored candy sprinkles, 1/4 cup
- Microwave or blow dryers
- High/Low Temperature gloves


Safety & Disposal
Wear safety glasses and use a high/low temperature glove for removing melted candy from the microwave.
Teacher Preparation and Disposal
Purchase the pipe materials and precut the pipes into lengths that match the lengths of the aluminum foil tubes. Lightly sand the ends of the pipes to remove any burrs. Secure the pipes and aluminum foil tube with a clamp to a ring stand for more precise timing. The bottom edge of the pipes and tube should be 15-20cm above the desk to facilitate timing. Cushion the fall of the magnets as they hit the desktop with folded up towels, several folded paper towels, bubble wrap, or foam packing material placed directly under the pipes and tube. Neodymium magnets chip easily. All materials can be reused.
Safety & Disposal
Wear safety glasses and use a high/low temperature glove for removing melted candy from the microwave.
- Safety Gloves Required
- Safety Goggles Required
Procedures
Upload or copy the student activity sheet. Construct a process box for each group using a 4” × 4” box. One of each of the following processes should be written on each side.
- Subducted into an ocean trench (melted)
- Wind weathering removes the surface rock layer
- Folded and compressed to form a mountain
- Compacted and heated by a meteorite
- Additional sediment deposited by a flood
- Ejected as lava from a volcano (add a melted candy to existing rock)
Change processes if desired to better match your locale and the processes students can observe in the region. You can also add the time it takes for a particular process to occur to the sides of the cube. Candy may be disposed of in classroom trash and boxes may be reused.
- Unwrap one candy piece and flatten it so that it covers the plastic dish bottom.
- Add a single layer of sprinkles and press gently into the candy layer.
- Add a second candy layer on top of the sprinkles. This is your beginning rock.
- Sketch the beginning rock.
- Roll the geologic process cube and alter your rock as the top process indicates.
- Sketch the altered rock and identify the rock type.
- Continue steps 5 and 6 until you have rolled the geologic process cube at least 5 to 8 times or the number directed by your teacher.
- Record all data in the table below.
Prepare the geologic process cubes for each group.
Discuss with students that each roll of the cube represents a period of time. If you wish, you may place a length of time on each process on the cube and then have students add the time for their rock cycle.
Review with students the difference between warming (candy will be very soft and pliable) versus melted (candy will be liquid).
Data and Observations

Analysis and Discussion
Explain what type of rock you initially created.
Sedimentary—2 layers of sediment (candy), held together by one layer of cement (sprinkles).
Explain whether every type of rock was present in the rock cycle activity.
Student answers will vary.
Draw and label a model rock cycle that matches your activity data. Label rock types, geologic processes, and the sources of energy for the processes the rock underwent.
Model should match student data, which will not look like a typical book model.
Compare your rock cycle to at least 2 of your classmates’ rock cycles. Explain how they are alike and different.
Student answers will vary.
- Average the total time for the magnet to fall over the 5 trials for each type of pipe. Students answers will vary but all groups should have similar data.
1. Which type of pipe or tube interacted most strongly with the magnet? What evidence supports your claim?
Electric conductivity (10.E6 Siemens/m)
- Silver 62.1
- Copper 58.7
- Gold 44.2
- Aluminum 36.9
https://www.tibtech.com/conductivite.php?lang=en_US
Copper slowed the magnet the most, so it produced the strongest electrical field to interact with the magnetic field. See the electrical conductivity table above.
2. Which type of pipe or tube interacted the least with the magnet? What evidence supports your claim? PVC – had no effect on the time it took the magnet to fall.
3. Explain which pipes or tube are most likely electrical conductors. What evidence supports your claim? Copper and aluminum are electrical conductors. Both pipes increased the time for the magnet to fall. See the table above.
4. Explain whether the number of magnets made a difference in the time. More magnets create a stronger magnetic field strengthening the opposing interacting forces, increasing the time it took the magnet to fall.
5. Using your data as evidence, explain the interaction between electric and magnetic forces. There are opposing forces, the magnetic field and the electric field, interacting between the magnet and the copper and aluminum pipes which increases the time it takes for the magnet to fall. This is Lenz’s Law.
6. Using the same materials, how could this experiment be modified to collect additional data to support the claim you made in item 4. Student answers will vary but here are some suggestions. Take some aluminum off the roll to investigate if the time changes. Use a ring magnet traveling on the outside of the pipe instead of the disk magnet traveling on the inside of the pipe. Lengthen the pipes.
Buy the Kit
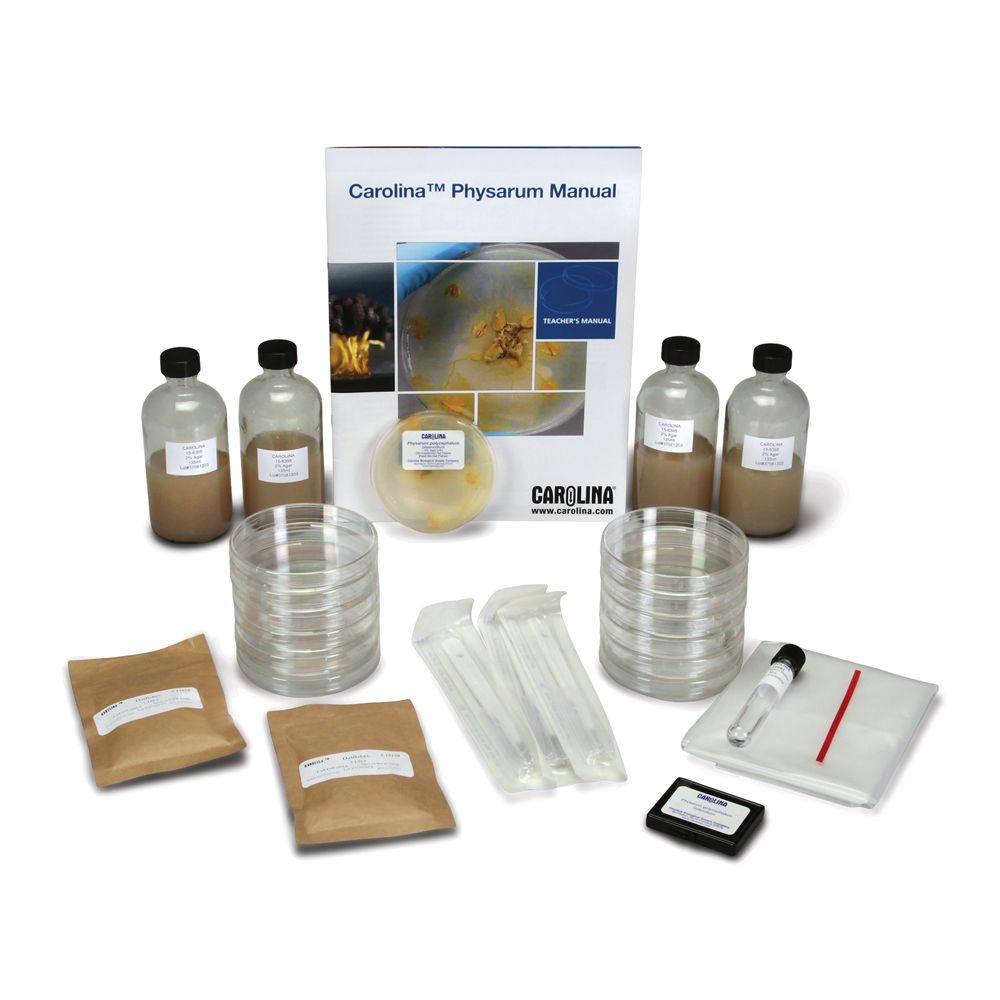
For a class of 30. What is it? A protist? An animal? Despite its confusing taxonomic status, the creeping slime mold Physarum polycephalum is still an attention getter for your students. Students can follow through the life cycle observing the active plasmodial stage and the inactive sclerotial stage. With teacher instructions.
Additional Reference Kits
Helpful Links
- Investigating the Rock Cycle Classroom Project Kit
- Origami Organelles™ 3-D Paper Model Kit: Rock Cycle
- Economy Introductory Rock Set
- Photo Card Set, Rock Types, Pack of 9
- Multimedia Earth Science Lessons for Interactive Whiteboards: Rocks, Single User
- Chemical and Mechanical Erosion of Rocks Kit
- Rock Candy: An Edible Study of Crystallization
- Infographic - Rock Candy for Rookies: A Beginner's Guide to the Sweet Stuff
- Volcano in the Classroom
We Save You Time
We are committed to providing the lab kits, instructional materials, and often free activities and supporting digital resources that do as much heavy lifting for you as we can.


*Next Generation Science Standards® is a registered trademark of Achieve. Neither Achieve nor the lead states and partners that developed the Next Generation Science Standards were involved in the production of this product, and do not endorse it.
The Rock Cycle and Earth Processes
A Carolina EssentialsTM Activity

Total Time: 30-45 minutes
Prep: 30 mins | Activity: 30-45 mins

Earth and Space Science
6-8
Middle School
Introduction
This is an introductory activity that relates earth processes to the rock cycle. Students construct a rock cycle model based on rolls of a geological process cube. The rock cycles generated using the cube should be unique to each group or student, just like rocks in different places go through different processes depending on local weather, climate patterns, and plate movements. A rock cycle is rarely as simple as textbook diagrams portray. Weathering and deposition, temperature, and pressure interact to modify rocks over time.
Essential Question
How are rocks formed and altered through the cycling of earth’s materials?
Phenomenon
Carefully observe the rock samples provided by your teacher. What patterns do you observe? What hypotheses can you propose about how the rocks were formed?
Activity Objectives
- Create a model to describe how the cycling of earth’s materials forms and alters rocks.
- Determine and explain the energy source for each cycle process.
Next Generation Science Standards* (NGSS)
PE MS-ESS2-1. Develop a model to describe the cycling of earth’s materials and the flow of energy that drives this process.
SCIENCE & ENGINEERING PRACTICES
Developing and Using Models
- Develop and use a model to describe phenomena.
DISCIPLINARY CORE IDEA
ESS2.A: Earth’s Materials and Systems
- All earth’s processes are the result of energy flowing and matter cycling within and among the planet’s systems. The energy is derived from the sun and earth’s hot interior. The energy that flows and matter that cycles produce chemical and physical changes in earth’s materials and living organisms.
CROSSCUTTING CONCEPTS
Stability and Change
- Explanations of stability and change in natural or designed systems can be constructed by examining the changes over time and processes at different scales, including the atomic scale.
Safety & Disposal
Wear safety glasses and use a high/low temperature glove for removing melted candy from the microwave.
Materials
- Rock samples for phenomenon
- Rock photographs
- 4” × 4” box for constructing the geology processes cube
- Weigh boat
- Craft stick
- Soft fruit chew candies, 5–8
- Dark colored candy sprinkles, 1/4 cup
- Microwave or blow dryers
- High/Low Temperature gloves
Procedures
Upload or copy the student activity sheet. Construct a process box for each group using a 4” × 4” box. One of each of the following processes should be written on each side.
- Subducted into an ocean trench (melted)
- Wind weathering removes the surface rock layer
- Folded and compressed to form a mountain
- Compacted and heated by a meteorite
- Additional sediment deposited by a flood
- Ejected as lava from a volcano (add a melted candy to existing rock)
Change processes if desired to better match your locale and the processes students can observe in the region. You can also add the time it takes for a particular process to occur to the sides of the cube. Candy may be disposed of in classroom trash and boxes may be reused.
STUDENT PROCEDURES
- Unwrap one candy piece and flatten it so that it covers the plastic dish bottom.
- Add a single layer of sprinkles and press gently into the candy layer.
- Add a second candy layer on top of the sprinkles. This is your beginning rock.
- Sketch the beginning rock.
- Roll the geologic process cube and alter your rock as the top process indicates.
- Sketch the altered rock and identify the rock type.
- Continue steps 5 and 6 until you have rolled the geologic process cube at least 5 to 8 times or the number directed by your teacher.
- Record all data in the table below.
TEACHER PREPARATION AND TIPS
Prepare the geologic process cubes for each group.
Discuss with students that each roll of the cube represents a period of time. If you wish, you may place a length of time on each process on the cube and then have students add the time for their rock cycle.
Review with students the difference between warming (candy will be very soft and pliable) versus melted (candy will be liquid).
Data and Observations

Analysis and Discussion
Explain what type of rock you initially created.
Sedimentary—2 layers of sediment (candy), held together by one layer of cement (sprinkles).
Explain whether every type of rock was present in the rock cycle activity.
Student answers will vary.
Draw and label a model rock cycle that matches your activity data. Label rock types, geologic processes, and the sources of energy for the processes the rock underwent.
Model should match student data, which will not look like a typical book model.
Compare your rock cycle to at least 2 of your classmates’ rock cycles. Explain how they are alike and different.
Student answers will vary.
SHOP THE KIT
ADDITIONAL REFERENCE KITS
SAFETY REQUIREMENTS
- Safety Gloves Required
- Safety Goggles Required
HELPFUL LINKS
- Investigating the Rock Cycle Classroom Project Kit
- Origami Organelles™ 3-D Paper Model Kit: Rock Cycle
- Economy Introductory Rock Set
- Photo Card Set, Rock Types, Pack of 9
- Multimedia Earth Science Lessons for Interactive Whiteboards: Rocks, Single User
- Chemical and Mechanical Erosion of Rocks Kit
- Rock Candy: An Edible Study of Crystallization
- Infographic - Rock Candy for Rookies: A Beginner's Guide to the Sweet Stuff
- Volcano in the Classroom
VIEW MORE ESSENTIALS
*Next Generation Science Standards® is a registered trademark of Achieve. Neither Achieve nor the lead states and partners that developed the Next Generation Science Standards were involved in the production of, and do not endorse, these products.


