Blood evidence can be analyzed as either biological or physical evidence, making it a powerful specimen for teaching forensics across multiple disciplines. Using biology concepts, investigators can use blood to identify individuals by blood type and DNA.
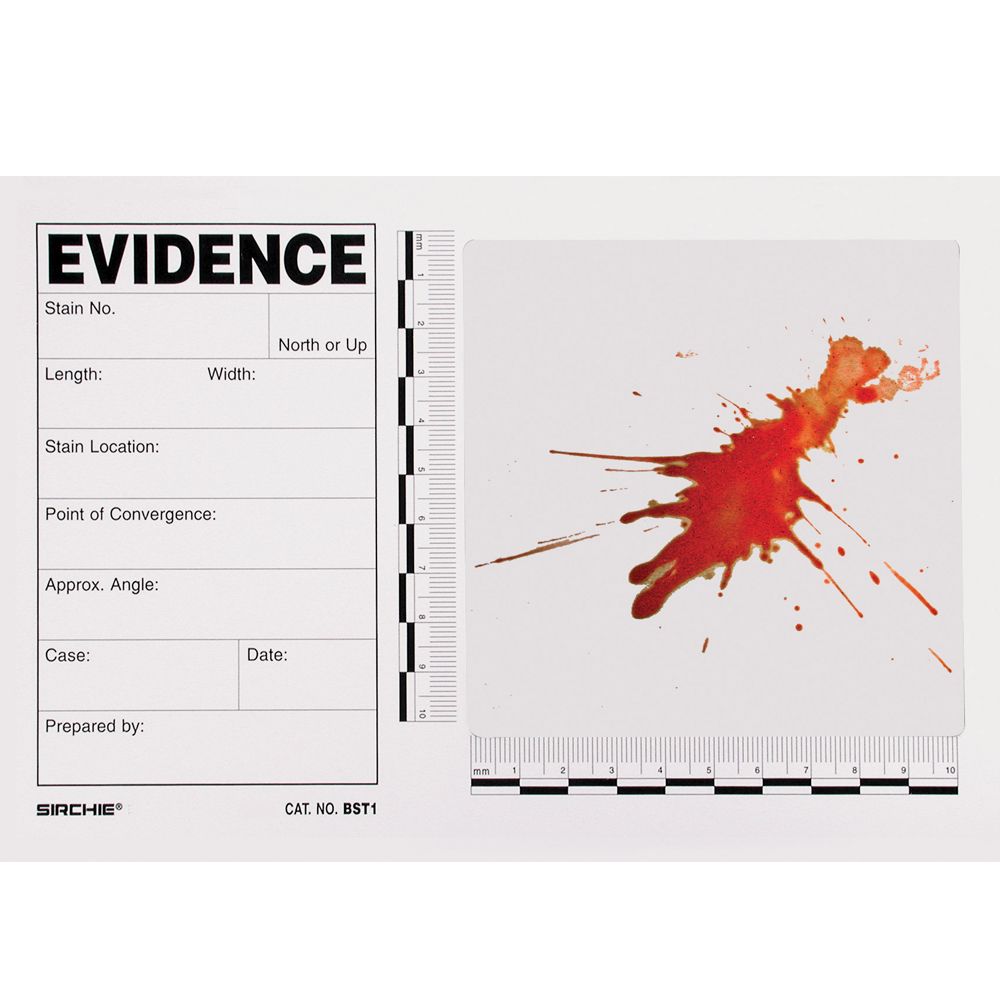
When a suspected sample of blood is discovered at a crime scene, real world applications of chemistry such as presumptive blood testing with luminol can confirm or deny the presence of blood. And at scenes with blood spatter, the size and location of blood droplets can be analyzed using physics concepts to recreate the incidents of the science by calculating angles of incidence.
This collection of activities provides unique ways of teaching and investigating blood evidence in your classroom.

Is the substance at the crime scene blood or an unknown substance?
Use a luminol reaction to perform a presumptive blood test.
Follow established laboratory safety practices and use appropriate personal protective equipment (PPE) such as gloves, chemical splash goggles, and lab coats or aprons.
1. Prepare the luminol solution the morning of the investigation.
a. Combine 0.18 g of luminol, 10 g of Clorox 2 powder, and 60 mL of water in a 100-mL beaker. Stir the mixture with a glass stirring rod.
b. Allow the mixture in the beaker to sit for 10 minutes.
c. After at least 10 minutes have elapsed, decant the luminol/Clorox 2/water
mixture into the labeled spray bottle or dropper bottles.
d. Repeat steps a–c for as many luminol spray solutions as you have student groups.
2. Create a mock crime scene by applying a drop of luminol reactive blood and non-reactive blood substances on a piece of fabric or on a wood table. Create as many mock crime scenes as you have student groups.
| Sample | Bloodstain A | Bloodstain B | Bloodstain C | Bloodstain D |
|---|---|---|---|---|
| Observations: (color, texture, stain shape | Bright red, thick, and tear drop shaped | Dark red, thin, tear drop shaped | Dark purple, thick, streaked line | Pale red, light and thin, smeared |
| Prediction: | Blood | Not Blood | Not Blood | Blood |
| Reaction with Luminol: | No | Yes | No | No |
| Conclusion: | Bloodstain A visually appears like human blood, but luminol testing demonstrated that it is not blood. | The test results for Bloodstain B are consistent with human blood in both appearance and reactivity with luminol. | Bloodstain D visually appears like human blood, but luminol testing demonstrated that it is not blood. | Bloodstain D visually appears like human blood, but luminol testing demonstrated that it is not blood. |

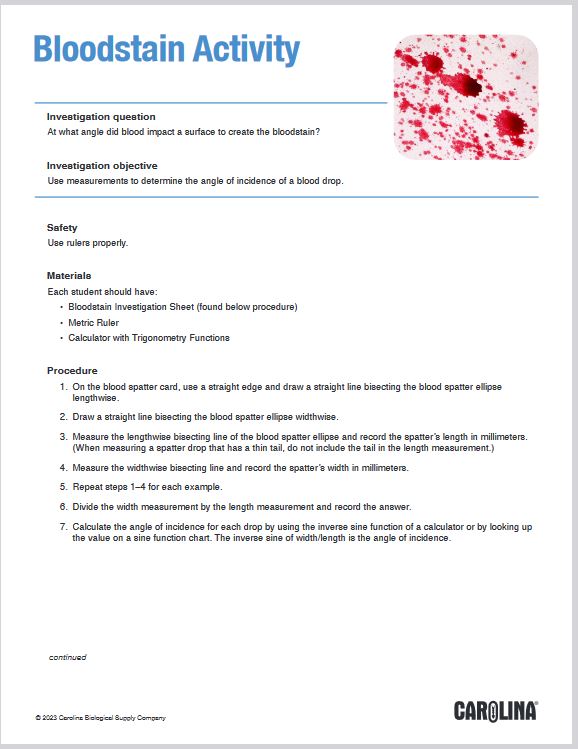
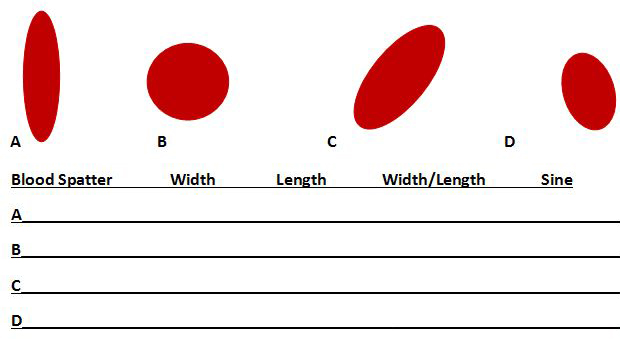
At what angle did blood impact a surface to create the bloodstain?
Use measurements to determine the angle of incidence of a blood drop.
Each student should have:


How can blood typing be used to identify and connect a suspect to a crime scene?
Perform ABO-Rh blood typing to identify the blood type of an unknown sample.
Follow established laboratory safety practices, including appropriate personal protective equipment (PPE) such as gloves, chemical splash goggles, and lab coats or aprons.
Each student should have:
1. Mix/shake all vials well before starting the activity.
2. Record in data table the number of each blood sample.
3. Using one of the blood samples, place a drop into each well of the blood-typing slide.
4. Add a drop of synthetic anti-A serum (blue) to the well labeled A and replace the cap.
5. Add a drop of synthetic anti-B serum (yellow) to the well labeled B and replace the cap.
6. Add a drop of synthetic anti-Rh serum (clear) to the well labeled Rh and replace the cap.
7. Using a different color mixing stick for each well (blue for anti-A, yellow for anti-B, white for anti-Rh), gently stir the synthetic blood and antisera drops for 30 seconds. Discard each mixing stick after a single use to avoid contaminating your samples.
8. Examine the thin films of liquid mixture. If the film remains uniform, there is no agglutination. If the sample appears granular or clumpy, agglutination has occurred. Record in the table positive agglutination or no reaction for each well. 9. Clean the blood typing slide and repeat the procedure for the remaining blood samples.
1.Identify the blood type of each sample you tested.
2. Describe the cause of agglutination when performing a real blood typing test.
3. Explain how blood typing can be used to connect a suspect to a blood sample found at a crime scene.
Examine the global distribution of blood types below to answer questions 4 and 5.
| Blood Type: | A+ | A- | B+ | B- | AB+ | AB- | O+ | O- |
| Percent of Global Population: | 31% | 2.5% | 15% | 1% | 5% | 0.5% | 42% | 3% |
4. What influence does the blood type of a suspect have in a forensic investigator’s ability to narrow down between suspects in the population of a small town? City? State?
5. Considering that the global population is over 8 billion (and growing), what are some limitations of using blood typing for forensics identification?
6. List other types of biological tests that can be performed on biological evidence such as blood. When and why would the tests you listed be preferred by forensic scientists instead of using blood typing?
| Sample 1 | Sample 4 | |
|---|---|---|
| Anti-A | Agglutination | No reaction |
| Anti-B | Agglutination | No reaction |
| Rh | No reaction | No reaction |
| Blood Type | AB- | O- |
Looking for a ready-to-use forensic blood typing kit? We have you covered.
Get the latest news, free activities, teacher tips, product info, and more delivered to your inbox.